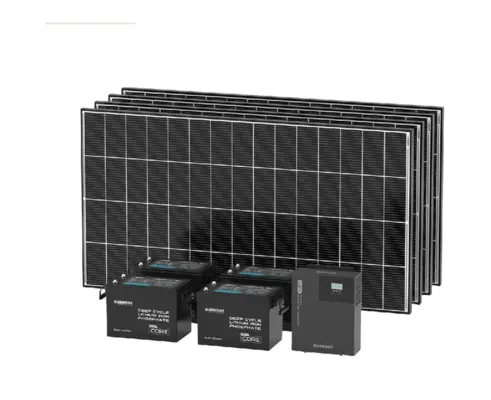
This is the gateway build — the smallest complete solar system that changes daily life. One panel, one small battery, a run of 12V LED strips, and the shed stops being the dark building where you hold a flashlight in your teeth. It's a half-day project, it costs less than a nice flashlight collection, and every skill it teaches — the connection order, the fusing habit, the wire-gauge check — is the exact curriculum the bigger builds in this series assume. If the projects pillar is a syllabus, this is week one. Here's the full build.
Why 12V DC lighting (and not an inverter)
The architecture decision that makes this build elegant: skip AC entirely. Modern 12V LED strips and fixtures deliver serious workshop light straight from the battery — no inverter, no conversion loss, no idle draw, and one less component to buy or fail. The whole system speaks one voltage: panel through controller to battery, battery through a fused distribution block to light branches, switches in the branches like any wiring project since Edison. This is also the decision our 12V-vs-AC architecture comparison generalizes: loads that exist in good 12V versions (lights, fans, USB, pumps) should stay DC, and the inverter waits until a load genuinely demands it. The shed that starts here adds the inverter the day the first power tool moves in — the graduation our workshop guide covers — with every component of this build carrying forward.
Component list
100W panel + Z-bracket mount
$The standard donor panel on the shed's sunniest face — deliberately oversized for a lighting load, which is the point: the surplus is winter margin today and workshop headroom tomorrow. Z-brackets and a cable gland make the mounting a thirty-minute job.
Charge controller (10–20A)
$A modest PWM controller runs this build honestly; a small MPPT costs a bit more and joins the parts bin's future — the trade our PWM-vs-MPPT comparison prices out. Either way: LiFePO4 profile set before the panel connects, battery-first order always.
LiFePO4 battery (20–50Ah)
$–$$The mini-to-small class from our battery guide: 20Ah runs evening lighting sessions for days per charge; 50Ah adds the USB station, a vent fan, and the expansion appetite this build reliably develops. Wall-mounted, ventilated, fused at the terminal.
12V LED strips + shop fixtures
$The payload: high-CRI 12V LED strips under the shelf line and over the bench throw shadow-free task light, and 12V shop fixtures cover the general fill. Warm-to-neutral color temperature reads better on wood and skin than the blue-white default; buy a grade up on CRI and the bench becomes a place you like standing.
Fuse block, switches & wiring
$The spine: a 6-circuit fuse block at the battery feeds each branch — bench lights, general lights, USB, spare, spare, spare (the spares are a prophecy) — with marine-grade wire sized per the wiring guide and simple 12V toggle or motion switches where hands expect them. This little panel of fuses is the build's real lesson.
USB/12V outlet station
$The quality-of-life branch: a panel-mount USB-C/USB-A socket pair and a 12V outlet by the bench turns the shed into the place phones and tool batteries top up — a trivial load that earns daily gratitude. The face-panel habit from the chuck box build, wall-mounted.
The build, in order
Panel on the roof first — sunny face, latitude-ish tilt, gland the cable entry. Inside: controller and battery on a plywood board on the wall (the board is the trick: pre-mount everything on the bench, hang it as one unit), battery to controller, configure LiFePO4, then panel — the order this series repeats because reversing it kills controllers. Fuse block off the battery's fused main lead; then the pleasant part: running strips and fixtures, placing switches where habit wants them (door switch for general lights, bench switch at the bench, motion switch if the shed is a walk-through), and wiring each branch through its fuse. Label the block, tape the wiring-guide card inside the door per the pillar's documentation habit, and flip the switch on a building that suddenly has evenings.
The half-day timeline, honestly
For calibration, here's how the build actually spends a Saturday. Hour one: panel on the roof — brackets, gland, cable dressed along a rafter. Hour two: the plywood board on the bench — controller, fuse block, and battery mounts laid out with the wire runs planned before anything is fixed, which is the step that separates tidy systems from squirrel nests. Hour three: the board on the wall, battery connected to controller, profile configured, panel landed, main fuse in — and the voltmeter's first reading, the build's quiet victory moment. Hours four and five: the pleasant lighting work — strips stuck and screwed, fixtures hung, switches placed, each branch fused and labeled as it lands. The final thirty minutes belong to documentation and cleanup: the card inside the door, the photo of the board, the offcuts binned. Builders who've done the multimeter walk on someone else's mystery system understand why the label maker gets invited: every minute of labeling repays ten at the first troubleshoot, and the shed that's wired legibly is the shed whose expansions stay legible too. Sunset test: lights on, phone charging, flashlight formally retired to the truck where it belongs.
Designing light like a workshop
Lumens matter less than placement: task light at the bench from strips mounted forward of your head (light from behind you is shadow manufacturing), general fill from the ridge or shelf line, and a dedicated strip inside the big storage cabinet that ends the headlamp archaeology. Switch zoning follows use — nobody wants the whole shed blazing to grab a screwdriver — and the motion-switch entry light is the touch that makes the build feel professional. The 12V catalog has matured enough that dimmers, motion sensors, and even smart relays exist natively; resist smart-everything on version one and let the toggle switches teach you which zones you actually use. Lighting is the rare project where the design work is entirely about your own habits, and the second weekend's small adjustments — a strip moved, a switch relocated — are where it becomes yours.
The expansion prophecy
Every shed lighting build follows the same arc, so plan for it cheerfully. Month one adds the USB station if it wasn't in version one. Season one adds a vent fan on a thermostat switch — a natural 12V load the battery barely notices. The first winter adds the security branch, merging this build with the shed security system on the shared backbone. And the first serious project in the newly-lit space starts the workshop conversation: more panel, more battery, the inverter, the workshop guide's full architecture — with this build's panel, controller, battery, and fuse block all serving as the foundation they secretly always were. The spare fuse positions weren't optimism; they were scheduling.
Bottom line
One panel, one small battery, one fuse block, and an afternoon — the smallest complete solar system, teaching the biggest share of the skills. Build it for the light; keep it for the curriculum; and let the spare fuse slots fill on schedule, because they will. The shed light is the rare purchase that upgrades every future project's odds before those projects even have names — a foundation with a light switch, which is the best kind of foundation there is.
Frequently Asked Questions
How many lights can a small solar setup run?
Generously many — LED efficiency means a 20–50Ah LiFePO4 carries hours of full workshop lighting for days between sun. Lighting is among the friendliest loads in solar, which is why it's the ideal first system.
Why not just use an inverter and normal shop lights?
Conversion loss, idle draw, cost, and a failure point — for a load that exists in excellent native-12V versions. Keep DC loads DC and add the inverter when a real AC load (power tools) moves in; the architecture comparison covers the full logic.
Do I really need the fuse block for a few lights?
Yes — it's the build's core lesson and its safety spine: every battery fused at the terminal, every branch fused at the block. It also makes the inevitable expansions a five-minute job instead of a rewiring.
What's the best color temperature for shed lighting?
Warm-to-neutral white with decent CRI reads best on wood, tools, and hands — the cold blue-white default is the classic regret. Task strips at the bench, warmer general fill, and the space stops feeling like a fridge interior.
Can this system grow into full workshop power?
That's its destiny — panel, battery, controller, and fuse block all carry forward into the workshop guide's architecture when tools demand an inverter. The lighting build is the workshop system's first installment, on purpose.