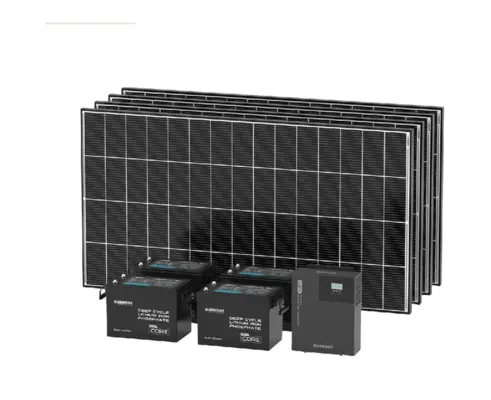
The shed is where the expensive things sleep — tools, bikes, the mower, the project car's parts — and it's precisely where household security systems don't reach. This build fixes that with one panel-fed battery running a camera, a motion floodlight, and an entry sensor: a complete security node with no trench, no outlet, and no monthly panel-drain anxiety. It's also the ideal second project after the shed light circuit, reusing the same backbone. Here's the full component list and the build.
The architecture
One small solar system, three loads. A 50–100W panel on the shed's sunniest face feeds a charge controller and a compact LiFePO4 battery inside; the battery runs a 12V motion floodlight over the door, powers a security camera (via a 12V-to-USB buck converter for the common USB-powered cameras), and — optionally — a door/window sensor tied into your existing smart-home hub via the camera's WiFi or a long-range sensor. The design principle: the battery carries the always-on camera draw as the baseline load, while the floodlight's motion-triggered bursts ride on top. Size for winter (the camera runs all night when nights are longest) and the system is maintenance-free by design — the same seasonal placement walk as our lighting guide, nothing more.
Component list
Solar camera (integrated option)
$$The shortcut path: current solar security cameras — the class our security camera reviews rank, Reolink's Argus line being the reference — integrate panel, battery, and camera in one weatherproof unit with app alerts and local or cloud storage. If the shed has WiFi reach, one of these plus a solar floodlight is the whole build in twenty minutes. The component build below wins on capability and expansion; this wins on speed.
100W panel + mount
$The component route's collector: a rigid 100W panel on a fixed tilt mount, angled per the workshop guide's rule — the shade-free roof face beats the perfectly oriented one. Overkill for the loads is the point: winter margin.
Charge controller (10A class)
$A 10A PWM controller handles this build honestly at minimum cost; step to a small MPPT if the parts bin will feed bigger builds later — the tradeoff our PWM vs MPPT comparison settles. Either way: LiFePO4 charge profile, and the battery-first connection order, always.
LiFePO4 battery (20–50Ah)
$–$$The system's heart, sized for the camera's overnight draw times your worst-case cloudy stretch — a 20Ah mini covers efficient cameras; 50Ah adds floodlight-heavy winters and expansion headroom. LiFePO4's cycle life makes this a decade component; the mini class from our battery guide is the natural fit.
12V motion LED floodlight
$A hardwired 12V motion flood over the door draws nothing until triggered and skips the built-in-battery compromise of all-in-one solar floods — your system battery is bigger and better placed than any fixture's. Aim it down the approach path, tune the sensitivity, spare the neighbors.
Buck converter + fusing + wiring kit
$The completers: a 12V-to-USB buck converter for USB cameras, inline fuses on the battery and each load branch, marine-grade wire, and weatherproof glands for the panel entry. The fusing is non-negotiable — every build on this site fuses every battery — and the gland is what keeps the shed's roof honest.
Choosing the camera: the decisions that matter
The camera market splits along lines that matter differently at a shed than a front door. Power draw leads everything here — efficient standby is worth more than any headline feature, because it's the number your battery carries all night — and the spec sheets bury it, which is why measuring with an inline DC meter before finalizing battery size is the build's smartest hour. Storage philosophy comes second: local SD or hub recording keeps the system subscription-free and network-light, while cloud plans buy convenience at a monthly price and an upload power cost. Resolution matters less than night performance at shed distances; a camera that renders a face at the door in the dark beats a 4K unit that renders noise. And the mounting question is really a coverage question: one camera watching the door and approach beats two watching walls, because sheds are entered through doors and windows, not scenery. The security camera reviews rank the current field; this build's advice is simply to pick from it with the battery's budget as the first filter. One last shed-specific note: interiors count too — a second cheap camera inside, facing the door, costs one more fused branch and turns 'someone opened the shed' into 'here is their face,' which is the difference between an alert and a police report worth filing.
The build, in order
Mount the panel on the sunny face and run the cable through a gland before anything electrical happens. Inside: mount controller and battery on the wall (ventilated, off the floor), connect battery to controller first, set the LiFePO4 profile, then connect the panel — the connection order that headlines our wiring guide because reversing it kills controllers. Fuse the battery lead at the battery. Wire the floodlight branch with its own fuse, mount and aim it, and test the motion window after dark. Power the camera through the buck converter, confirm WiFi reach (a mesh node in the house's nearest window solves most shed-WiFi gaps), and set its alert zones. Total honest build time: a Saturday morning, most of it mounting rather than wiring.
Sizing and winter math
The camera is the budget: efficient units draw a trickle continuously, which across a long winter night sums to a modest daily watt-hour bill the 100W panel recovers in a fraction of a sunny day — and that surplus ratio is your cloudy-week insurance. Run the numbers with your camera's real draw (the watt-meter habit from our sizing guide, applied at 12V with a cheap inline DC meter), and let the battery hold several nights of it. If the math runs tight — power-hungry cameras, floodlight-happy raccoons, deep northern winters — the fix order is: bigger battery first, then panel, then an efficiency pass on the camera's settings. Systems sized this way run years between thoughts.
Expansions the backbone invites
The same battery happily grows the node: a second camera watching the yard's far approach, a driveway sensor, a small siren, 12V lighting inside the shed (merging this build with the lighting circuit into one system), or a smart relay that lets the phone arm and disarm the floodlight. Each addition is a fused branch and a line in your load math. And when the shed graduates to full workshop duty, this security backbone folds into the bigger system from our workshop guide — the panels multiply, the battery grows, and the security loads become one more branch on a system that now runs saws. That's the project-solar pattern working as intended: nothing thrown away, everything a foundation.
Bottom line
One panel, one battery, three fused branches, one Saturday — and the building where the expensive things sleep finally watches its own door. Take the integrated-camera shortcut if speed rules; build the component version if the shed's future is bigger. Either way, the trench you never dug is the best part of the budget — and the backbone you did build is the first block of every bigger system the shed will ever want — security first, workshop next, the pattern holds.
Frequently Asked Questions
Can a solar camera really run all winter?
Sized honestly, yes — the build's surplus panel ratio exists for short days, and the battery holds several nights of camera draw for cloudy stretches. Integrated all-in-one cameras are tighter on margin than the component build, which is the component route's core advantage.
Do I need WiFi at the shed for this to work?
For app alerts and remote viewing, yes — a mesh node at the house's nearest window solves most gaps, and some cameras offer local-SD recording that works without any network. LTE-based cameras are the no-WiFi alternative for far outbuildings, covered in our property camera build.
Why not just use an all-in-one solar floodlight camera?
They work, and they're the twenty-minute answer. The component build wins on battery size and placement, winter margin, expansion (more cameras, sensors, lighting on the same backbone), and repairability — the usual DIY-versus-integrated trade.
What maintenance does this system need?
A seasonal panel wipe, a glance at connections during the equinox placement walk, and battery storage habits it mostly manages itself. LiFePO4 plus fused 12V wiring is about as maintenance-free as electricity gets.
Is 12V safe to work with?
Low-voltage DC is the friendly end of electrical work — the risks are heat from undersized wire and unfused shorts, not shock. Fuse every battery and branch, size wire to the load, follow the connection order, and the build is beginner-appropriate.