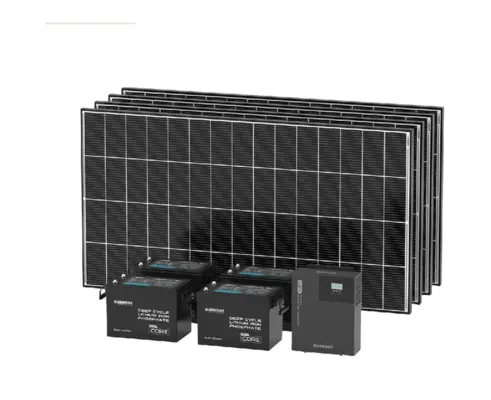
The detached workshop is the classic solar sweet spot: a building that needs real power, sits too far from the house for a cheap trench, and has a perfectly good roof doing nothing. A right-sized solar kit turns it into an independent little power plant — lights, chargers, fans, and a healthy diet of power tools — without an electrician, a permit fight, or a hundred feet of buried conduit. Here's how workshop solar differs from shed-light solar, and the kits that handle actual tool loads.
Workshop loads are surge loads
What separates a workshop from a garden shed is the nature of the demand. LED lighting and phone chargers sip steadily; a miter saw, table saw, or compressor slams the system with a startup surge several times its running draw, for a second or two, every single trigger pull. That surge is the design constraint: the inverter (or power station) must carry it without folding, and the battery must deliver current fast enough to feed it. The happy news is that the energy involved is small — tools run in bursts, and a day of serious hobby woodworking often consumes less total energy than people fear. The pattern that works: modest daily harvest, meaningful battery, and an inverter with generous surge headroom. Corded hand tools and modern brushless battery-tool chargers are easy passengers; the stationary saws and compressors are what you size for.
Two architectures, one decision
Workshop solar comes in two builds. The component route — rigid panels on the roof, charge controller, LiFePO4 battery bank, and a quality inverter — delivers the most capacity per dollar and the cleanest permanent install; it's Renogy's home turf, and the kits bundle the matched parts. The power-station route parks a portable unit in the shop, fed by roof or ground panels — costlier per watt-hour but zero-wiring, indoor-friendly, and the station moonlights everywhere else you need power (the double-duty argument from our backup guide). Plenty of shops run the hybrid: fixed panels charging a station through its solar input. Tiers below are $/$$/$$$; no invented specs or reviews, and our shed solar reviews cover the lighter-duty end of this spectrum.
Quick comparison
| Setup | Tier | Architecture | Best for |
|---|---|---|---|
| Renogy 400W kit + LiFePO4 + inverter | $$ | Component | The standard serious hobby shop |
| Renogy 800W starter system | $$$ | Component | Daily-use shops, heavy tools |
| Bluetti station + roof panels | $$–$$$ | Hybrid | No-wiring shops, dual-duty power |
| 200W kit + battery | $ | Component | Lights, chargers, light tools |
| DIY: panels + server-rack LiFePO4 | $$ | Component | Builders chasing max Wh/$ |
The picks
Renogy 400W kit + LiFePO4 bank + 2000W-class inverter
$$The standard serious-hobby build: four 100W rigid panels on the shop roof, a Rover-class MPPT controller, a LiFePO4 bank sized to your usage, and an inverter with the surge headroom stationary tools demand. Renogy's kits bundle the matched panel-and-controller half; the battery and inverter picks in our LiFePO4 guide complete it. Expandable panel-by-panel as the shop grows.
Renogy 800W starter system
$$$The daily-driver shop build — enough harvest to run a working shop's full day and recharge the bank besides, with headroom for a compressor habit. This is the fixed-install package we recommend across the site for outbuildings that have graduated from hobby to workhorse duty.
Bluetti power station + fixed roof panels
$$–$$$The zero-wiring route: a 2kWh-class expandable station living in the shop, fed by rigid panels through its solar input. Surge-capable inverters in the current generation handle stationary tools, the app tracks the energy budget, and the station leaves for campsites and blackouts whenever needed. The right architecture for renters, rented shops, and anyone allergic to wiring.
200W kit + compact battery
$The honest light-duty tier: two panels, a small controller, a modest LiFePO4 battery, and a mid-size inverter covers LED lighting, battery-tool chargers, fans, a radio, and corded hand tools in moderation. The classic first workshop system — and a completely sufficient final one for many shops.
DIY: panels + server-rack LiFePO4 + your inverter
$$The builder's route from our projects page: component panels, a server-rack-style LiFePO4 battery, and an inverter you choose deliver the best capacity-per-dollar in this article — with you as the system integrator. Our DIY solar generator project and LiFePO4 battery guide cover the parts bin.
Workshop electrical accessories
$Whichever architecture: budget the unglamorous completers — proper gauge wiring, fusing and breakers, a battery monitor with a shunt so you actually know your state of charge, cable glands for the roof entry, and outlet strips rated for the loads. Undersized wiring is the classic DIY workshop-solar failure; the accessories kit prevents it.
Sizing the shop system
Work backward from a real Saturday. List what runs and roughly how long: lights all session, the saw in bursts totaling minutes of actual runtime, a charger or two cycling, maybe a fan or small heater's steady draw. Most hobby sessions sum to a modest energy budget that a 400W array recovers in a day or two of sun — which is why the classic mistake isn't under-paneling but under-inverting: buying watt-hours while skimping on the surge rating that lets the table saw start. Match the inverter to your biggest tool's startup demand with margin, size the battery for your longest realistic session plus a cloudy-day reserve, and let the panels be the slow, steady refill. The sizing calculator runs your specific list.
Installation notes for outbuildings
Workshop installs are the friendliest solar there is — low roofs, no HOA sightlines, and forgiving stakes — but a few practices pay off. Face panels within shouting distance of south at roughly your latitude's tilt and don't agonize; a shop roof's imperfect angle costs less than shade does, so prioritize the shade-free section of roof over the perfectly oriented one. Bring cables through a proper gland or junction box, not a drilled hole and hope. Mount the controller, battery, and inverter on an interior wall with ventilation clearance, batteries off the cold slab, and fuse both the panel and battery sides. And label the disconnects — the person servicing this system in five years is you, with none of today's context. A weekend of careful install buys a decade of flip-the-switch power.
Heating, cooling, and the seasonal shop
Climate loads deserve their own honesty, because they're where workshop-solar dreams meet arithmetic. Resistance space heating is the hungriest load in the building — running one from a modest battery bank measures runtime in minutes, not evenings — so cold-climate shops do better with insulation, a small propane or diesel heater for the work sessions, and solar handling everything else. Cooling is friendlier: a fan is a trivial load, and a small efficient window or portable AC in moderation sits within a serious system's budget for the hours a shop actually needs it. The design principle: let solar own the electrical loads it's brilliant at — light, charging, tools, ventilation — and resist forcing it to be a furnace. Shops that respect that boundary run happily on the systems in this guide; shops that don't buy twice.
Bottom line
Size the inverter for your loudest tool, the battery for your longest Saturday, and the panels for a lazy refill — then pick the architecture that fits your building and temperament: Renogy components for the permanent install, a Bluetti-class station for the zero-wiring life, or the DIY route for maximum capacity per dollar. The shop roof was always a power plant waiting for panels.
Frequently Asked Questions
Can solar really run power tools like a table saw?
Yes — the constraint is inverter surge capacity, not solar. Stationary tools demand a large startup surge for a second or two; size the inverter (or power station) for that surge with margin, and the actual energy consumed per session is modest.
How many panels does a workshop need?
Most hobby shops thrive on 200–400W of panel; daily-use shops with heavy tools justify 800W. Panels are the refill rate, not the power — the battery and inverter do the real-time work.
Do I need a permit for shed or workshop solar?
Off-grid outbuilding systems that never touch the utility avoid interconnection entirely, and small installs often fall under permit thresholds — but local rules vary, so a quick check with your building department is the honest answer before roof work.
Is a power station or a component system better for a shop?
Components win on cost per watt-hour and permanence; a power station wins on zero wiring, portability, and double duty as home backup. The hybrid — fixed panels feeding a station — is a legitimate best-of-both for many shops.
What battery size should a workshop have?
Enough for your longest realistic session plus a cloudy-day reserve — for typical hobby use that lands in the 1–2kWh range, scaling up for heaters, compressors, or daily work. A battery monitor with a shunt turns the guesswork into a gauge.