Affiliate Disclosure: SolarBuild.co earns commissions from qualifying purchases through Amazon Associates and eBay Partner Network. This doesn't affect our editorial independence — we recommend products based on research and real-world testing data, never paid placements.
Running an electrical line to a backyard shed can cost anywhere from $500 to $2,500 depending on distance and local codes. A solar panel kit can power lights, charge tools, and run small appliances for a fraction of that — with zero monthly bills.
We researched dozens of panels and kits to find the five that make the most sense for shed owners in 2026. Every pick below uses monocrystalline cells (the current standard for efficiency and longevity), includes real-world output data, and works with standard 12V battery systems.
Renogy 200W 12V Solar Starter Kit
The Renogy 200W Starter Kit is the default recommendation across forums, YouTube builds, and beginner solar guides — and for good reason. The kit includes two 100W monocrystalline panels, a 30A PWM Wanderer charge controller, all necessary cabling (20ft adaptor kit + 8ft tray cable), Z-brackets, and branch connectors. Everything you need except the battery.
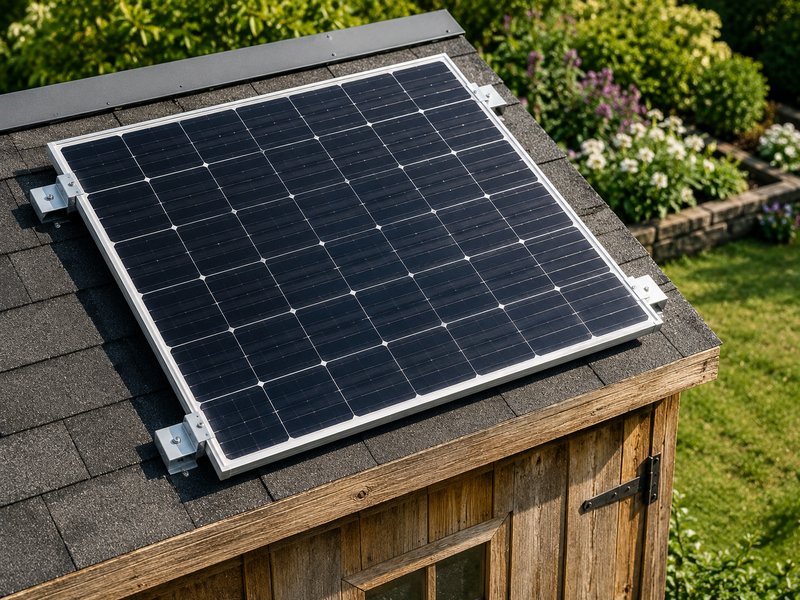
Real-world testing shows 160–180W of actual production during peak sun hours. The panels use a thick 35mm aluminum frame with pre-drilled mounting holes for fast installation. The controller supports sealed, gel, flooded, and lithium batteries with 4-stage charging, and the system is expandable to 400W using the same controller.
If you only look at one kit on this list, make it this one. It covers 90% of shed use cases at a price that's hard to beat for the quality.
ECO-WORTHY 200W 12V/24V Solar Kit
The ECO-WORTHY 200W kit delivers nearly identical specs to the Renogy at roughly $40–50 less. You get two 100W monocrystalline panels, a 30A PWM charge controller, Z-brackets, and all wiring — a true plug-and-play system.
The panels use corrosion-resistant aluminum frames and pre-drilled holes for quick mounting. Multiple reviewers specifically testing shed installations report slightly better low-light performance in morning and evening hours compared to similarly-priced panels. The kit can be wired in series (24V) or parallel (12V) depending on your battery bank.
If you're budget-conscious and don't need Renogy's brand premium, this kit is a no-brainer. The $40 you save can go straight toward a better battery.
HQST 200W N-Type Compact Solar Panel
If your shed has limited roof space, one larger panel beats two smaller ones. The HQST 200W N-Type uses advanced 16-busbar Grade A+ cells to achieve 25.4% efficiency — the highest on this list — in a compact footprint. One panel, one set of mounts, one cable run. Clean and simple.
At $0.60 per watt, it significantly undercuts the portable solar panel market average of $0.80–1.00/W. The anti-corrosion aluminum frame handles 2400Pa wind and 5400Pa snow loads, and HQST rates it for 87.4% output retention after 30 years.
Note: This is a panel only — no charge controller or wiring included. Pair it with a 20A–30A MPPT controller and a 12V battery for the best results. Ideal for DIYers who want to pick their own components.
Renogy 100W 12V Solar Starter Kit
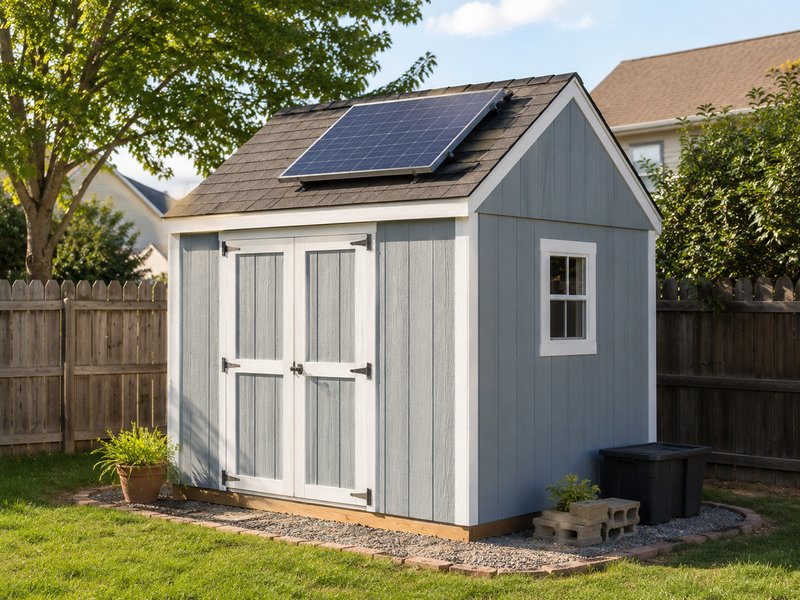
Not every shed needs 200+ watts. If you're just running LED lights, charging phones, and maybe powering a small radio, the Renogy 100W kit is all you need. It includes a single 100W panel, 30A PWM controller, cables, and Z-brackets.
The 100W panel is Renogy's most popular product for good reason: it's compact, lightweight, and has the thickest frame (35mm) in its class, making it especially easy to mount. In testing, the panel produces around 70W of real-world peak output — enough to keep a 50Ah battery topped off for lighting and small loads.
The 30A controller means you can add a second 100W panel later without replacing any electronics. Think of it as the "try solar first" option.
ECO-WORTHY 400W 12V Solar Kit
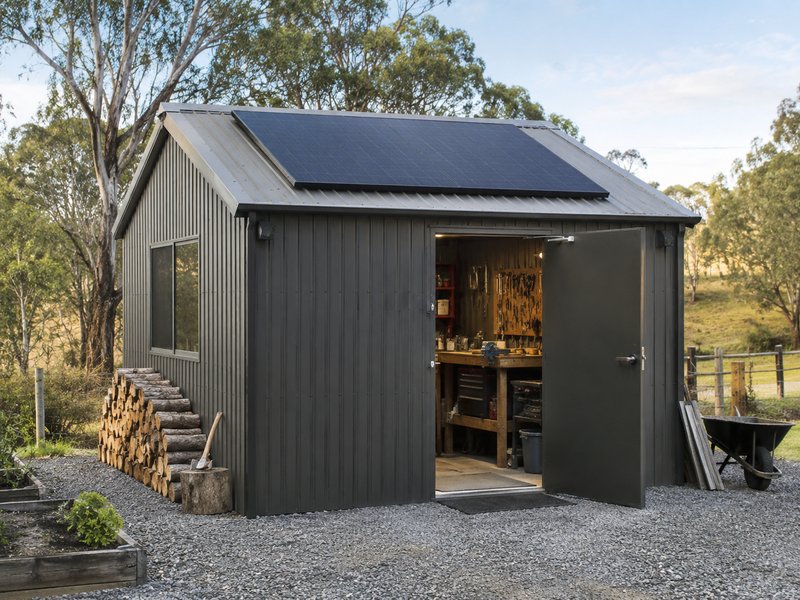
Running a real workshop? Four 100W panels deliver serious daily power — enough for LED shop lights, a bench grinder, battery chargers for cordless tools, a mini fridge, and more. The ECO-WORTHY 400W kit includes all four panels, a 30A controller, mounting hardware, and wiring.
At 1,600Wh per day, you're generating enough energy to support a full afternoon of workshop activity when paired with a 200Ah+ lithium battery bank. The four-panel layout also gives you flexibility on shed roofs — two panels per slope on a gable roof, or all four on a large south-facing surface.
This is the most power you can get in a single kit at this price point. For sheds that double as a workspace, it's the right call.
Quick Comparison
| Kit | Wattage | Efficiency | Controller | Price | Best For |
|---|---|---|---|---|---|
| Renogy 200W Kit | 200W | 22% | 30A PWM ✓ | ~$200 | Most shed owners |
| ECO-WORTHY 200W | 200W | 21.5% | 30A PWM ✓ | ~$165 | Budget buyers |
| HQST 200W Panel | 200W | 25.4% | Not included | ~$120 | DIY builders |
| Renogy 100W Kit | 100W | 22% | 30A PWM ✓ | ~$140 | Small sheds / lighting |
| ECO-WORTHY 400W | 400W | 23% | 30A PWM ✓ | ~$325 | Workshops |
How to Size Solar for Your Shed
Step 1: Figure Out Your Daily Power Needs
Add up the wattage of everything you want to run, multiplied by hours of daily use. A few examples:
- LED lights (4 bulbs × 10W × 5 hrs) = 200 Wh/day
- Phone/tool charging = 50–100 Wh/day
- Small fan (30W × 4 hrs) = 120 Wh/day
- Mini fridge (50W × 10 hrs) = 500 Wh/day
- Power tools (intermittent) = 200–500 Wh/day
A basic shed with just lights and charging needs around 250–350 Wh/day. A workshop with tools and a fridge might need 800–1,600 Wh/day. Use our Solar Sizing Calculator for a personalized estimate.
Step 2: Match Panel Wattage to Your Needs
Divide your daily energy need by the average peak sun hours in your area (typically 4–5 hours in most of the US). Example: 800Wh ÷ 4 hours = 200W of panels. That's the Renogy or ECO-WORTHY 200W kit.
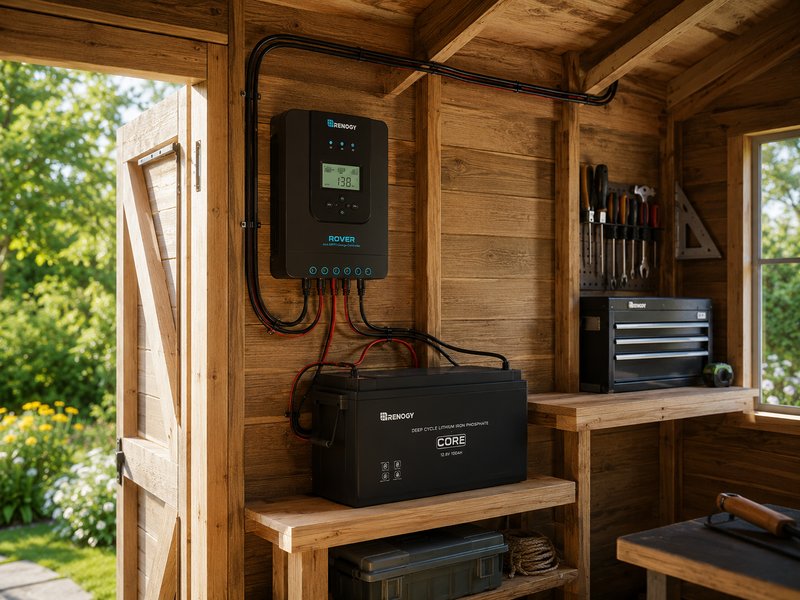
Step 3: Choose the Right Battery
Your battery bank should store at least 1.5–2× your daily energy need to account for cloudy days. For a 200W system producing 800–1,000Wh daily, a 12V 100Ah LiFePO4 battery (1,280Wh capacity) is ideal. Lithium batteries cost more upfront but last 5–10× longer than lead-acid and can be discharged to 80–90% of their capacity versus only 50% for lead-acid.
Step 4: Mount and Wire
Most shed roofs accept standard Z-bracket mounting. Angle the panels south (in the northern hemisphere) at roughly 30–45° for maximum annual output. Run cables through the roof or wall into the shed where your charge controller and battery live. Keep cable runs as short as possible to minimize voltage drop — use 10AWG wire for runs under 20 feet.
PWM vs. MPPT Controllers
All five kits on this list include or work with PWM controllers, which are simpler and cheaper. If you're spending over $300 on your total system, consider upgrading to an MPPT controller — it extracts 15–30% more power from the same panels, especially in cold or cloudy conditions. The Renogy Rover 20A MPPT (~$90) is a popular upgrade.
Our Verdict
For most shed owners, the Renogy 200W Starter Kit is the right choice. It hits the sweet spot of power output, build quality, and ease of installation. If budget is tight, the ECO-WORTHY 200W delivers 95% of the Renogy experience at a lower price. DIYers who want to pick their own components should look at the HQST 200W N-Type panel for the best efficiency per dollar.
Small sheds that only need lights? Start with the Renogy 100W kit and expand later. Running a real workshop? Go straight to the ECO-WORTHY 400W — it's cheaper than buying two 200W kits separately.
Whatever you choose, you'll be paying less for shed power in the first year than running an electrical line — and nothing at all after that.