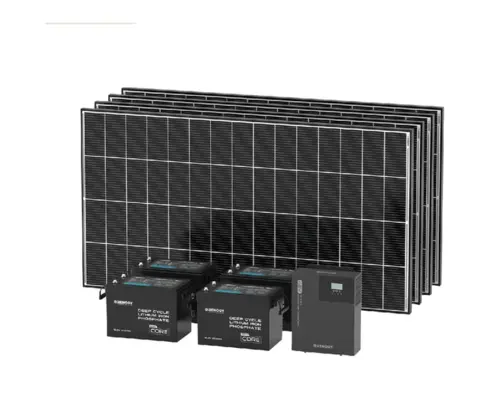
A small ground mount holds up in winter when three things are settled before the first post goes in: the snow and wind loads your local code uses, the load ratings of the panel and the racking, and a layout that lets snow slide clear. Steeper tilt sheds snow faster, but wind, spacing and anchoring decide whether the structure stays put. For anything beyond a hobby rack, get the numbers from your building department and the mount maker.
Why winter loads decide the design
A panel on a ground frame is a flat surface held up by a few legs, and winter puts weight and force on it that a summer day never does. Snow adds weight on the panels and on the rails beneath them. Wind adds uplift and sideways push, and a wind gust on a snow-covered, ice-glazed array hits a larger area. Ice adds both weight and surface. None of these loads is a guess in professional design: engineers start from published ground snow and wind values tied to the site, and apply code factors for exposure and tilt. SkyCiv's worked example for a ground-mounted panel shows how involved the method is, using ASCE 7 wind pressure coefficients and a separate snow calculation, and it states plainly that it is an example, not a design standard.
Snow load: weight and sliding
Surge PV's glossary describes the usual chain: start with the ground snow load from ASCE 7 maps or local building records, adjust it for exposure and other factors, then reduce it for the slope of the panels. It also says that drifts and snow sliding from upper rows are handled separately, since sliding snow can pile against lower rows. Its tilt guidance is useful for a builder: steeper tilts shed snow faster, with panels at 30 degrees or more often clearing within days of a storm while low-tilt panels can hold snow for weeks, but a higher tilt can increase shading between rows. That page is from a solar software vendor, so confirm any figure with your building department.
Wind and tilt
Wind load depends on the site's exposure, the height off the ground, the tilt and the structure's stiffness. SkyCiv's example treats a panel tilted 45 degrees or less as an open sloped roof and a steeper one as a solid sign, which shows that the method changes with angle. For a DIY builder the takeaway is practical rather than mathematical. A steep, tall array in an open field catches more wind than a low one behind a windbreak, and a seasonal adjustment that tilts the array steeply in January also changes its exposure. Our mount comparison covers the adjustable option, and the maker of your rack should state the wind and snow ratings for each tilt setting.
Ice and what we cannot verify
Ice adds weight to the panels, the rails and the legs, and a frozen layer on the glass will not slide the way loose snow does. We did not find a primary source that gives a simple ice rule for small ground mounts, so we give no number. Ask your building department whether atmospheric ice is part of the design loads for your area, and read the rack maker's published ratings. Do not chip at ice on panels, as the snow clearing guide explains.
Anchors, footings and spacing
How deep the footing goes and what holds it depends on soil, frost depth and the loads above, so it is a local answer. Use the rack maker's footing instructions and your local requirements, and ask the building department whether a permit or an engineer's stamp is needed for a ground-mounted array, even a small one. Some practical layout choices follow from the snow guidance:
- Leave clearance below the lowest edge. Surge PV recommends space below the lowest panel edge so sliding snow has somewhere to go instead of burying the bottom row.
- Keep sliding snow away from paths and doors. Place the array so a sheet of snow does not land on a walkway, a shed door or a vehicle.
- Space rows for sun and slide. More tilt means longer shadows behind each row.
- Keep wiring high and protected. Run cables where drifts and meltwater cannot reach connectors, and see the weatherproofing guide for connector care.
A pre-winter walk-around
| Check | What to look for |
|---|---|
| Footings and posts | Heaving, tilt, cracks or movement since last season |
| Fasteners and clamps | Loose hardware, missing washers, panel clamps that have shifted |
| Tilt setting | Locked at the angle you chose, with pins and bolts fully seated |
| Cables and connectors | Strain relief, sun-cracked insulation and connectors off the ground |
| Ground clearance | Brush, stored items and drifts that could pile up under the low edge |
| Snow-slide zone | Nothing parked or stored where sliding snow would land |
Do this before the first hard freeze, and again after the first big storm. Repeat it after any strong wind. A loose clamp in October is a ten-minute fix, while the same clamp after a snow load can mean a damaged panel. If anything looks bent, shifted or cracked, stop using that section and ask the rack maker or a qualified installer before reloading it.
Check both ratings before you buy
Two numbers have to agree: what the panel is rated to carry and what the mount is rated to carry. Surge PV notes that racking makers publish maximum snow load ratings, and that exceeding them voids the warranty. Panel datasheets carry their own mechanical load ratings, and a mount designed for one panel size may not suit another. The pre-freeze checklist includes a walk-around for loose hardware, and the grounding and lightning basics cover the bonding side of a metal frame in open ground.
Bottom line: Get your local snow and wind loads from the building department, check that both the panel and the racking are rated for them, and pick a tilt that sheds snow without casting long shadows on the next row. Leave clearance below the lowest edge, follow the rack maker's footing instructions, and treat ice as an unknown to ask about locally.
Frequently Asked Questions
Does a steeper tilt help with snow?
Surge PV says steeper tilts shed snow faster, with panels at 30 degrees or more often clearing within days, but higher tilt can increase shading between rows. Check the rack maker ratings for each tilt.
Where do I find my local snow and wind loads?
Ask your local building department. Surge PV says ground snow load comes from ASCE 7 maps or local building records, and wind speeds are site specific as well.
Do I need a permit for a small ground mount?
It depends on your jurisdiction. Ask the building department whether a permit or an engineer review applies, even for a small array.
What if my rack and my panel have different load ratings?
The lower rating governs. Surge PV says racking makers publish maximum snow loads and that exceeding them voids the warranty, so check both documents.
How should I handle ice on panels?
Do not chip it. Wait for it to loosen, and follow the panel maker care guide. We found no primary source with a simple ice rule for small mounts.
Sources and verification
The load method and tilt points below come from the sources listed. Your local building department, the rack maker ratings and the panel datasheet set the numbers for your site.
- Surge PV, Snow Load Calculation (solar software vendor glossary): ground snow load from ASCE 7 or local records, slope reduction, drifts and sliding, steeper tilt shedding snow, clearance below the lowest edge, and racking maker snow ratings.
- SkyCiv, ground-mounted solar wind and snow load example (ASCE 7-16): open-roof versus solid-sign wind methods by tilt, and the statement that it is a worked example, not a design standard.
- Solar.com, Removing Snow from Solar Panels: snow sliding off warm panels.
We did not find a primary source for ice loads, footing depths or wind ratings of small DIY racks, so we state no numbers for them. Rely on the rack maker and your local code.